Showing posts with label dollar. Show all posts

Wednesday, May 25, 2016

DIY Marble Dollar Tree Pots for Succulents

I'm pleased to announce that I have completed another round of finals without dying. This means I am halfway there to my Bachelors Degree. (AHH)

I've been easing into summer, trying to recover and I did my first summer DIY the other day!
I picked up these succulents and a package of three mini terra-cotta pots from the Dollar Tree. I see this kind of stuff in stores, envision something adorable, do a scary evil laugh and toss them in my basket. Muahahahah

Okay but really, I just popped the succulents out of the cheapy plastic pots and gave the terra-cotta ones a quick coat of white spray paint.


I could tell you I tried what worked right away, but I feel it's my job to allow anyone and everyone to laugh at me and to also keep you from trying it these ways too. All I knew was that I wanted to marble them. (that's good grammar, right?)

I used the plastic pots the succulents originally came in to practice first, which was smart so I didn't ruin the other pots, but it also probably would have worked differently with plastic than with terra-cotta anyway. Oh well.

Initially I tried the tub of water thing. I've only ever seen it done that way with nail polish, but I figured I would try it anyway with the small samples of paint I have leftover from my craft shelf boxes.

FAIL

Then I found the one bottle of turquoisey-teal nail polish I had and tried that. 

Nope


I remembered seeing a tutorial for marbling nail polish with a plastic bag. They dotted a few drops of the leftover wall paint paint on the nail and used the plastic baggie to mix the colors.


I used the wall paint I orignally tried and painted a few spots randomly around the pot.

Then I used a piece of saran wrap (affiliate link) to mix the paint into a "marble" effect.

And I don't have a picture of this step, because I was covered in paint and didn't really feel like painting my camera.

But this is how they came out!


That's all! Show me pics of yours! #LittleBitsofLacey and I might just repost them :)


xoxo,
L

Thursday, May 21, 2015

Gold Dipped Bowls for $0.25!


So I've been done with school for like a week now, and so far I've gotten a whole lot of nothing accomplished. I've been working like crazy still (hopefully this will change soon) and trying to catch up some sleep. To keep up to date follow me and Bob on Instagram. You could have seen that Bob got a little rude and decided to bite my face yesterday! This picture doesn't even show how bad it is, and it's especially swollen now! 
 
(I also don't have pink hair, so I have no idea why this picture made me have some. It's kinda cool though, do I see hair chalk in my future?)


ANYWHO I have another super easy dollar store craft today. I mean it's not like I ever do these  I do these for like every post but you still love them, right? I recently picked up this four-pack of little baby glass dishes at the Dollar Tree.


I traced them on a foam plate, then traced the line with gold paint*. Then I just dipped the edges of the bowls into the paint! (someone please teach me how to paint my nails)

I'm using these to store some of my jewelry, but they can be used for lots of things. Think bobby pins, hair elastics, change, craft supplies. The options are endless!


And that's all. I swear I'll post a complicated craft someday..maybe.. ;)

Hope you enjoyed and hope you have a GREAT weekend!

xoxo, Lacey

*This is an Amazon affiliate link.

Thursday, April 30, 2015

DIY Dollar Tree Chalkboard Jar

Today's post is almost too simple.

All I did was buy a jar and some chalkboard labels both from Dollar Tree.
That's it guys. I stuck a label on a jar and I'm calling it a craft :)

It's a super cute way to hold Bob's treats though!


That's all y'all!

Hope you have a great day!
xoxo, Lacey & Bob


ee9b4c5bc4ec7297ce59b4a16c04ac76f0c20d930fc00e3c0d


Tuesday, April 7, 2015

From Candle Lid To Pretty Coaster

Hi! Today I'm sharing how I turned a candle lid into a pretty jeweled coaster! 

If you've ever been to Bath & Body Works you've probably been convinced to buy one of these delicious smelling bad boys.


Then you probably burned the whole thing in a day because it smelled so good. Anyone? Just me? Oh.

There are a million cute things to make with the jars when you're done though!

Today I used just the lid to make an adorable blingy coaster for my desk. 

All I needed was:

Any candle lid
E6000/Super Glue
Jewels/gems (affiliate links)


All I did was spread the glue with a tooth pick a little at a time and added the jewels in no certain pattern. 
(Cute envelope backdrop, right?)


That's it! I think this is so so pretty. I've been in the process of making my room fabulous (including the craft shelf I've been promising for 7 years) so I will be posting lots and lots about my progress organizing and decorating my bedroom!

Share any pictures of your own coasters by tagging me on Instagram or use the hashtag #LittleBitsofLacey

kisses!
xoxo, 
Lacey & Bob

Friday, February 6, 2015

DIY Simple Dollar Store Valentine's Decor

Love is in the air! 

I have started decorating my room this year for Valentine's Day with just a small package of "table scatter" from Dollar Tree. It had 60 of these pink and red glittery hearts.
I simply made a string of hearts for my window by sandwiching the small foam glitter hearts on a string of fishline.


I also did the same thing with some pieces of bakers twine in my doorway and on the dress hooks above my desk.

As most of my DIY's, it's super simple and I think it's super cute!

What creative dollar store decor do you L-O-V-E?

xoxo, Lacey

Wednesday, January 28, 2015

DIY Customizable Notebooks for under $1

Hello!
I'm alive!

I'd like to say that I've been traveling the world or something, but instead I've been spending time getting my life on track. I've had a hard time getting adjusted to college and have been working like crazy lately. It's a work in progress, but I'm finally figuring things out.
Anywhooooo
Today I started my second semester. (We have a January term) So this means I needed some pretty school supplies to stay organized.
I used this technique (I didn't actually come up with this technique, it's pretty popular in the planning world.) to make some pretty personalized notebooks.
*This post contains affiliate links sponsored by Amazon.


I printed my monogram and class name on a sheet of cardstock. I also laminated it for added durability (and because I think I'm cool beans because I have a laminator, this one
 to be exact), but all of that is completely up to you. Once I cut it down to size, I tore a sheet out of the notebook, lined it up on the cover, and marked each hole. I tried to get it as close to the center as possible so they would all line up.

I then punched the holes using a tiny hole punch
.

Once they were all punched, I cut a tiny little slit running from the left side of the hole to the edge of the cover.

Finally I just snapped it on using the scissors to push the little tabs into place.


And that's all!

These are completely customizable, and they make the 20 cent notebooks from Walmart super cute. And you can switch them out if you decide you don't like a cover!

I'd love to see pictures of your covers! Tag me on Instagram @LittleBitsofLacey or post them using the hashtag #LittleBitsofLacey

Have a great day! 
xoxo, Lacey

Tuesday, November 11, 2014

DIY Gold Leaf Frame Art


I swear my crafts are always the simplest. This is literally so simple.

All I did was spray paint some faux leaves gold and stick them in a frame.

That's it folks. 


If you recreate any of my projects, I'd love to see them! Feel free to send me an e-mail at LittleBitofLacey@gmail.com or post them with the hashtag #LittleBitsofLacey

xoxo,
Lacey

Tuesday, November 4, 2014

DIY "Blessings" Leaf Banner


It's November!
I'm not sure how, because it seems like just yesterday I graduated high school. This year is FLYING by. 

Today I'm sharing yet another simple dollar store craft.

Today I used some twine, faux leaves, stencils and paint.

I stenciled the letters onto the leaves, and once they dried threaded them onto the twine.


I tied mine up on the handles of my dresser, which I think turned out pretty cute!

If you recreate any of my projects, I'd love to see them! Feel free to send me an e-mail at LittleBitofLacey@gmail.com or post them with the hashtag #LittleBitsofLacey

I hope you all had a fabulous weekend, and have a great week ahead!
xoxo, Lacey

Monday, October 13, 2014

DIY Glueless Leaf Candle Holder


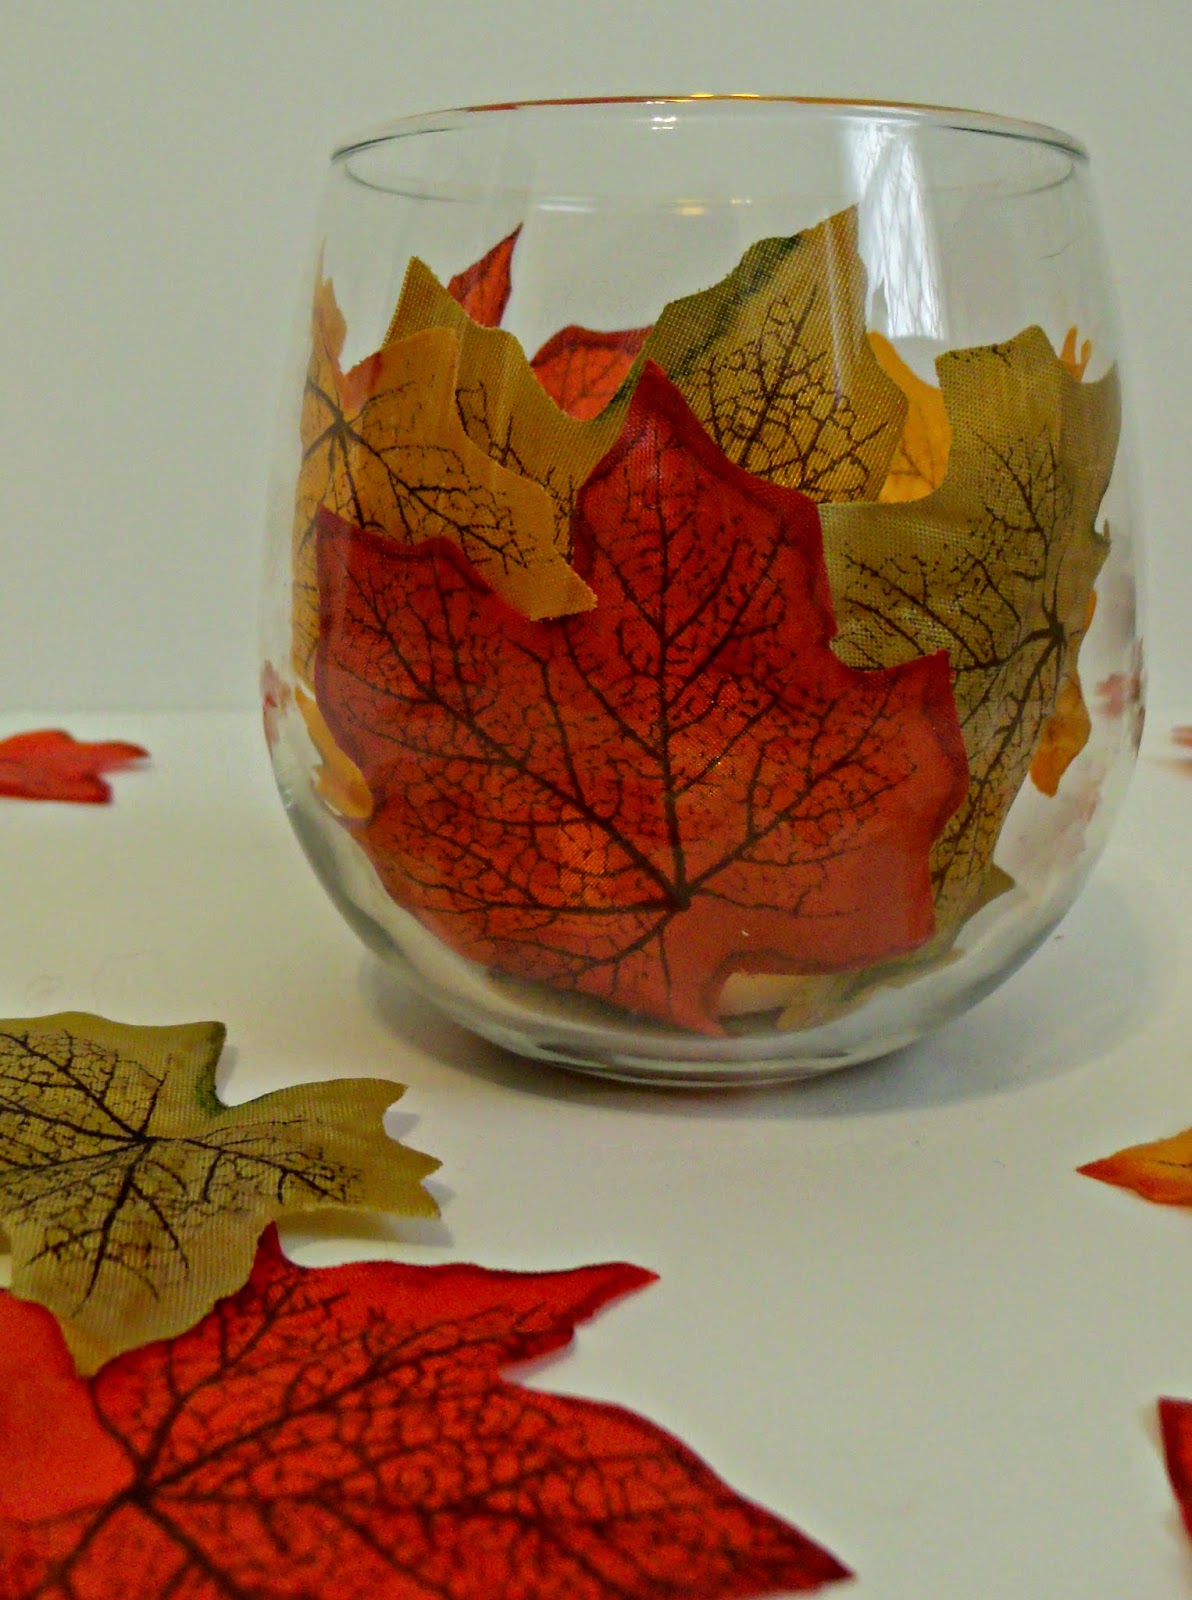
I've seen these all over Pinterest, but I didn't like the idea of gluing the leaves to the outside especially because I feel like they'd sorta peel off. Instead I just took some fake leaves and lined the inside of this little stemless wineglass. I just used a led tea light candle, because it's definitely a fire hazard to have the loose paper by flames. 

Another super simple dollar store craft!

If you recreate any of my projects, I'd love to see them. Feel free to send me an e-mail at LittleBitofLacey@gmail.com or post them with the hashtag #LittleBitsofLacey


Thanks for stopping by!
xoxo, Lacey


Saturday, September 20, 2014

DIY Wedding Decor

So about a month ago my sister and her fiancé decided to finally tie the knot. In a month. Enter me the temporary wedding planner. It's not going to be a traditional wedding, and with a short timeline and small budget we had to get creative. Here are some of the decorations.

I'll be posting after the wedding with all of the other simple decorations we used, and how it all came together, so stay posted for that!

You'll be able to see these babies in action, instead of just sitting on our kitchen table. At midnight. I really need to get my life together, people.


1. Floral Centerpieces
These have been floating around Pinterest for a while, but I couldn't track an original source. The idea behind these is SO simple, but I think they look seriously fancy shmancy if you ask me.

I used:
hot glue

wiffle balls
candle stick holders
fake flowers
wire cutters
fancy bits from Hobby Lobby

This is mind blowingly simple, I swear.
I simply cut the flowers off of their stems, and glued them into the holes of the wiffle balls. I glued some of the petals together to close any gaps between flowers where the ball might show, but the flowers were big enough that it wasn't a big problem. I glued the ball to the candlestick holder and then just added some of the little bits all around.
Ta-da!
 Fancy bits
 The nice ball before it's glued to the candle stick.
 Pretty, no?


2. Initials
Another super simple one. We used the initials of the bride and groom and a big &. For the glitter, we used Krylon Glitter Blast Glitter Spray. This photo sure as heck doesn't do any justice for the amount of sparkle there is. The L and A are just a plain blue. 


 3. Mr. & Mrs. Champagne Glasses

For this one I just picked up two of these glasses from Dollar Tree, used the same glitter spray, and picked up some alphabet scrapbooking letters. I also found this cool pearl trim in the scrapbook section too, and used acrylic gems as well.

 I taped off the glasses and painted the bottoms. Then I measured an inch from the top and lined up the pearl trim. Next I used a piece of masking tape to make sure I was gluing straight (I still managed to make it a little crooked) and glued the gems on in a pattern. I finally just added the Mr. and Mrs. and had a cute little set!


 I also took this gem (No pun intended) of a photo when I was spray painting. Bobby, oh, Bobby.

Thanks for stopping by!
xoxo, Lacey